How to Make a DIY Puzzle: A Simple Guide to Custom Creations
The Puzzle Maker's Compass: Your Quickstart Guide
You can create a completely custom puzzle from any personal photo, piece of artwork, or digital design you love. The process is flexible, allowing you to work either by hand with simple craft supplies or with a popular cutting machine like a Cricut.
Making and solving puzzles is more than just a fun, screen-free activity. It flexes your critical thinking skills and has been shown to significantly decrease cortisol levels, helping you relax. This project is perfect for making personalized gifts for family and friends or as a creative art activity for children.
This guide gives you a complete overview of the entire process, from your first idea to the finished product. We'll cover everything you need to know about how to make a puzzle from scratch.
Why Make Your Own Puzzle? The Benefits Beyond the Fun
Making your own puzzle is more than just a fun project; it's a powerful way to reduce stress, create meaningful gifts, and engage your creativity without a screen. It connects you to a hands-on activity that has tangible benefits for your well-being and relationships.
By creating a puzzle, you can:
- Engage Your Mind: It serves as a powerful, screen-free activity that sharpens critical thinking for both adults and children.
- Give Unique Gifts: You can create deeply personal gifts for friends and family that are far more meaningful than store-bought alternatives.
- Practice Mindfulness: The act of focusing on a single task can be a form of meditation, helping to reduce stress by lowering cortisol levels.
- Repurpose and Recycle: It's an excellent way to give a second life to children's artwork or repurpose materials like old cereal boxes.
The ultimate goal is to create high-quality, personalized jigsaw puzzles that look and feel professionally made.
The Two Paths to a Custom Puzzle: Machine vs. Manual
You have two main paths for creating a puzzle: an automated method using a digital cutting machine like a Cricut, or a hands-on manual method using a craft knife or pre-made blank puzzles. Your choice depends on the tools you have and the type of crafting experience you want.
The Automated Path (Cricut): This method uses a digital cutting machine, like a Cricut Maker or Explore, to precisely cut your design. You'll print your image on sticker paper, apply it to a sturdy backing like chipboard, and let the machine handle the intricate cuts. This path requires a computer and the machine's design software.
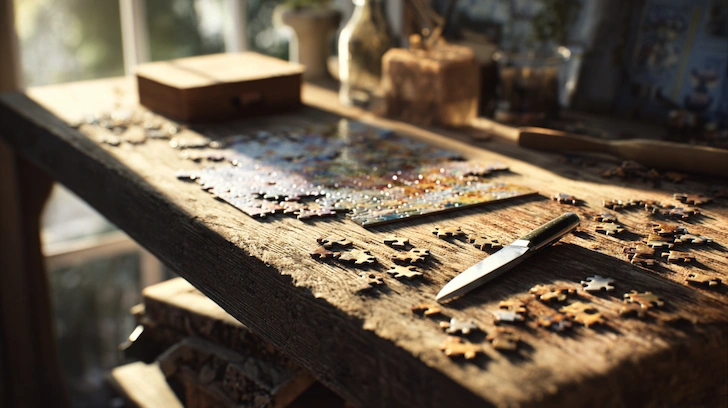
The Manual Path (By Hand): This approach is more hands-on and doesn't require any special machinery. You can either decorate a pre-made blank puzzle with markers and paint or manually trace and cut puzzle pieces from an image you've mounted on a backing. This is a fantastic, craft-focused option.
Your Puzzle-Making Toolkit: Choosing Your Materials and Method
Your required tools and materials will depend entirely on whether you choose the automated Cricut path or the hands-on manual path. Having the right supplies ready before you start will ensure the process is smooth and enjoyable.
For the Cricut Path:
- Backing: Light chipboard, Kraft board, or even a clean, flat cereal box.
- Image: A sheet of printable sticker paper.
- Machine: A Cricut with "Print Then Cut" capability (e.g., Maker, Explore, Joy Xtra).
- Tools: A StrongGrip mat, a brayer, a scraper, and the correct blade (Deep Point for chipboard or Premium Fine-Point for Kraft board).
For the Manual Path:
- Base: A pre-made blank puzzle, which you can find in sizes like 12, 28, and 36 pieces, or a blank wooden puzzle.
- Decoration: Acrylic craft paint, markers, or pencil crayons.
- Cutting: A sharp craft knife if you're cutting pieces from scratch.
- Protection: A craft varnish or sealant to protect your finished design.
The manual method using blank puzzles is an especially engaging way to explore how to make a puzzle for kids.
The Puzzle Fabrication Protocol: A Step-by-Step Guide
This step-by-step protocol will walk you through the precise process of preparing, printing, and cutting your puzzle design using a Cricut machine. Following these instructions will help you achieve clean, professional results.
- Prepare Your Design: In Cricut Design Space, upload a puzzle template (as an SVG or PNG file). Place your chosen image on the canvas, use the "Arrange" function to "Send to Back," and resize it to fit the template perfectly. Use the "Align" and "Center" tools to position it, then select both layers and use the "Attach" function to lock them together for cutting.
The process of turning a digital image into a physical object is surprisingly straightforward, which is why so many people want to learn how to make a puzzle from a photo.
Print and Assemble Your Materials: Follow the "Print Then Cut" prompts in the software. Make sure "Add Bleed" is turned on and use your printer's "Best Quality" setting for a vibrant image. After printing on sticker paper, carefully apply the sheet to your chipboard, using a scraper to smooth it out from one edge to the other to prevent air bubbles.
Cut the Pieces: Place the assembled material onto a StrongGrip cutting mat and use a brayer to press it down firmly. In Design Space, select the correct material setting (like "Heavy Chipboard") and change the cut pressure to "More" for a cleaner result. After the machine finishes, check that the cut went all the way through before unloading the mat. If it didn't, press the "Go" button again for a second pass.
Sidestepping Setbacks: Common DIY Puzzle Pitfalls to Avoid
You can avoid common frustrations like inaccurate cuts or flimsy pieces by understanding a few key pitfalls before you begin. Knowing what to watch out for will help you create a puzzle you're proud of.
- Inaccurate Cuts: If your Cricut isn't cutting precisely along the printed lines, your machine probably needs to be calibrated. You can find this quick and easy function within the Design Space menu.
- Bubbles Under the Sticker: To avoid bubbles, don't try to lay the whole sticker sheet down at once. Start from one edge and slowly press it down with a scraper as you go.
- Warped or Tiny Pieces: Avoid resizing puzzle templates to be significantly smaller. This can make the interlocking parts too small and fragile for the machine to cut properly or for you to handle. Making a template larger is usually fine.
- Flimsy Pieces: While you can use poster board, it often results in a flimsy puzzle that doesn't feel satisfying to assemble. For a sturdy, high-quality feel, always choose light chipboard or Kraft board for your backing.
From Pieces to Perfection: Finishing and Gifting Your Creation
With a few finishing touches, you can protect your puzzle and package it into a professional-looking, thoughtful gift. These final steps elevate your project from a simple craft to a cherished keepsake.
- Protect the Surface: To protect your puzzle from wear, apply a thin layer of craft varnish. Important: Be sure to take the puzzle apart before applying the varnish, or you will seal the pieces together permanently.
- Create a Surprise: For a fun twist, make a two-sided puzzle. Before you cut the pieces, you can paint or draw a second design on the back of the chipboard.
- Include a Reference: If you created a complex puzzle from a custom photo, take a clear picture of the assembled puzzle. You can print this out to include as a helpful reference image in the box.
- Package It Beautifully: Place your finished puzzle pieces in a small box or a decorative bag. Including the reference photo will give your gift a polished and professional touch.
Frequently Asked Questions
What are the main benefits of making your own puzzle?
Making a DIY puzzle is a powerful screen-free activity that sharpens critical thinking and can reduce stress by lowering cortisol levels. It also allows you to create unique, personalized gifts from photos or artwork and is a great way to repurpose materials.
What are the two main ways to make a DIY puzzle?
You have two primary options: an automated path using a digital cutting machine like a Cricut, or a manual path. The manual method involves either decorating a pre-made blank puzzle or tracing and cutting the pieces by hand with a craft knife.
How do I make a homemade puzzle without a special machine?
First, glue or stick your chosen image onto a sturdy cardboard backing. On the back, trace a grid and then sketch your puzzle piece shapes within the squares. Finally, use a sharp craft knife to carefully cut out each piece.
Do puzzles actually lower stress?
Yes, scientific studies have shown that after playing a puzzle game, the salivary levels of cortisol (the body's primary stress hormone) significantly decrease. The focused, single-task nature of puzzles acts as a form of mindfulness.
What is the best material for a sturdy, high-quality puzzle?
For a durable puzzle with a professional feel, use light chipboard or Kraft board as your backing. While you can use a cereal box or poster board, they often result in flimsy pieces that don't connect as satisfyingly.
Where can I find free puzzle templates for my Cricut?
You can find free puzzle templates (in SVG or PNG format) through searches on Google, Pinterest, or in Cricut-focused blogs and online communities. Many crafters share their designs for free, which you can then upload into Cricut Design Space.
What's the best way to remove cut pieces from the Cricut mat?
To avoid damaging your pieces, flip the mat upside down and gently peel the mat away from your material, rather than peeling the material off the mat. For any stubborn pieces, use a thin spatula to carefully lift them off the adhesive surface.
Can I sell the puzzles I make with downloaded templates?
This depends entirely on the license of the template you use. Many free designs are for personal use only, meaning you cannot sell the finished product. If you plan to sell your puzzles, you must use a template that includes a commercial license or design your own.
What is a good puzzle size for a toddler or preschooler?
For young children, puzzles with fewer and larger pieces are ideal. A 12-piece puzzle is a perfect starting point for toddlers and preschoolers, as it's challenging enough to be engaging without becoming overwhelming.


