How to Make a Puzzle From a Photo: A Complete DIY Guide
From Snapshot to Jigsaw: Your Quick-Start Guide
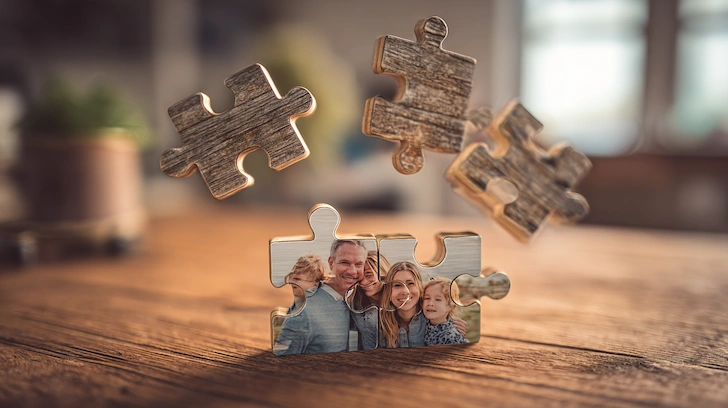
You can transform any personal photo into a puzzle in one of two ways: by using a simple online service for a professional result, or by creating a hands-on version at home. Both paths allow you to turn a cherished memory into a tangible, interactive keepsake.
Online services offer incredible customization, letting you choose the exact piece count, shape, and material. You can even design a custom box with a glossy finish, making this option perfect for creating a polished and impressive gift.
The do-it-yourself approach, on the other hand, offers a rewarding and creative project. It gives you complete control from start to finish, and you can learn more about creating a DIY jigsaw puzzle with just a few basic craft supplies. Photo puzzles are more than just a game; they are a unique way to bring family memories to life, creating a fun, screen-free activity and a keepsake you can frame and display.
Why Turn a Photo Into a Puzzle? The Benefits of a Custom Creation
Turning a photo into a puzzle creates a thoughtful, personal gift that encourages screen-free family time and brings your favorite memories to life. It transforms a simple digital image into a shared experience and a lasting memento.
- Create Thoughtful Gifts & Keepsakes: A custom photo puzzle is a fun and deeply personal gift, perfect for celebrating milestones like birthdays, anniversaries, holidays, or retirements.
- Encourage Screen-Free Family Time: Puzzles are a fantastic activity for the whole family, providing an interactive way to spend quality time together that encourages teamwork and conversation.
- Bring Memories to Life: You can turn favorite family portraits, vacation snapshots, or even funny everyday moments into a tangible object that can be enjoyed over and over again.
Path 1: Using an Online Service for a Professional Finish
Using an online service is the simplest way to create a professional-quality puzzle by uploading your photo and choosing from a wide range of custom options. The process is designed to be straightforward, guiding you from image to finished product in just a few clicks.
The core process involves choosing a single image or designing a collage of your favorite photos and uploading it to the service's online tool. From there, you can easily browse and select your desired specifications to create your ideal custom photo puzzles.
You have complete control over the puzzle's features and can select the perfect options for your project.
- Piece Count: Choose anything from a simple 30-piece puzzle for kids to a challenging 1000-piece puzzle for adults.
- Shape: Go beyond the classic rectangle with options like heart-shaped or circular puzzles.
- Material: Select from standard or thick puzzle board for added durability.
- Orientation: Ensure your photo fits perfectly by choosing a landscape, portrait, or square layout.
Further personalization options often include adding custom text, choosing from various design templates, and even designing a custom box. A crucial feature is the ability to preview your final design before ordering, ensuring the high-quality, vibrant print meets your expectations.
Path 2: The DIY Method for a Hands-On Project
The do-it-yourself method involves mounting a photo print onto a sturdy backing and cutting it by hand, giving you complete creative control. This path is perfect for anyone who enjoys a hands-on craft project and wants to build a puzzle from scratch.
The foundation of a DIY puzzle is a high-quality photo print. You will need to enlarge your photo to the desired puzzle size—A4 or A3 are great starting points for beginners—and get a glossy print from a photo processing store.
The primary materials required are simple and easy to find. You will need your photo print, a backing material like thin cardboard or cardstock, photo-safe acid-free glue, and a sharp craft knife.
The process involves carefully gluing the photo onto the backing, ensuring complete corner-to-corner coverage. After allowing it to dry thoroughly, you will be ready to cut out the pieces, which is a key part of learning how to make a jigsaw puzzle at home.
Your Action Plan: The 4-Step DIY Puzzle Framework
This 4-step framework guides you through preparing your photo, tracing the shapes, cutting the pieces safely, and finishing your custom puzzle. Follow these instructions carefully for a smooth and successful project.
Prepare and Mount the Photo
- Protect your work surface with a cutting mat.
- Apply an even layer of acid-free glue to your cardboard backing.
- Carefully place your photo print onto the glued surface, smoothing it out to remove any air bubbles, and let it dry completely.
- Use a paper cutter to trim the edges for a clean, professional look.
Trace Your Puzzle Shapes
- Turn the mounted photo over so you are looking at the blank cardboard side.
- To create classic interlocking shapes, use pieces from an existing puzzle as a template, tracing them onto the back of your project.
Cut the Pieces
- Safety First: Always wear safety goggles when using a craft knife and ensure adult supervision is present. Always cut away from your body.
- Using a sharp Stanley knife or X-Acto knife, carefully cut out the puzzle shapes you traced. A steady hand is key to getting clean lines.
Finish and Jumble
- For a more durable, glossy finish, you can apply a thin layer of clear glue over the top of the photo.
- Once everything is dry, jumble the pieces together. Your creation is now officially a puzzle, ready to be solved!
Common DIY Pitfalls and How to Avoid Them
Avoid common DIY mistakes like using the wrong glue or a dull blade by following these simple solutions for a successful project. A little preparation can prevent frustration and ensure your puzzle looks great.
Mistake: Using the Wrong Glue Standard craft glues can contain acids that will damage your photo over time, causing it to yellow or fade.
- Solution: Always use a product specifically labeled as "photo-safe" or "acid-free" to preserve your image for years to come.
Mistake: Incomplete Glue Coverage If you miss the edges and corners, the photo will peel away from the backing after you start cutting the pieces.
- Solution: Apply a thin, even layer of glue across the entire backing surface, paying special attention to the corners and edges.
Mistake: Cutting Too Soon Cutting before the glue is fully cured can cause the photo to tear or shift, ruining the piece you're working on.
- Solution: Be patient and allow the glue to dry thoroughly according to the manufacturer's instructions, even if it means waiting overnight.
Mistake: Using a Dull Blade A dull craft knife will tear the paper and cardboard instead of slicing cleanly, resulting in frayed, messy edges.
- Solution: Start every project with a fresh, sharp blade in your craft knife to ensure the cleanest possible cuts.
Choosing the Right Puzzle for the Perfect Experience
Choosing the right piece count and puzzle type ensures your custom creation is a fun and rewarding experience for its intended solver. The difficulty of a puzzle is determined by its piece count, so you should tailor your choice to the person who will be solving it.
- For Young Children: 60-piece puzzles are a great starting point that offers a fun challenge without being overwhelming.
- For Older Kids & Families: 252-piece puzzles are perfect for a family game night, encouraging everyone to work together.
- For Advanced Puzzlers: 520-piece and 1014-piece puzzles provide a more complex and engaging experience for dedicated puzzle fans.
Consider the type of puzzle that best fits your goal. A "Keepsake Puzzle" made with thicker board is ideal for framing, while a "Kids Puzzle" with larger pieces is great for little hands, and you can learn how to make a puzzle for kids that is both fun and durable.
Beyond puzzles, you can use your favorite photos to create other personalized gifts. Consider making memory card games, photo books, canvas prints, blankets, or mugs to share your memories in new ways.
Frequently Asked Questions
What are the two main ways to turn a photo into a puzzle?
You can either use a simple online service for a professional, highly customizable result, or create a hands-on version at home. The online path is quick and offers many options like custom boxes, while the DIY method is a rewarding craft project.
What are the benefits of creating a custom photo puzzle?
Custom photo puzzles transform your favorite memories into a tangible keepsake and a thoughtful, personal gift. They also encourage screen-free family time, providing a fun, interactive activity that promotes teamwork and conversation.
What options can I customize when ordering a photo puzzle online?
Online services offer extensive customization, allowing you to select the piece count, shape (like rectangle, heart, or circle), and material thickness. You can also add personalized text, choose from various design templates, and create a custom-designed box for your puzzle.
What materials are needed to make a DIY photo puzzle at home?
For a DIY puzzle, you will need a high-quality photo print, a sturdy backing material like cardboard, cardstock, or even a thin piece of wood for extra stability. You will also need photo-safe, acid-free glue and a sharp craft knife for cutting the pieces.
What are the most common mistakes to avoid when making a DIY puzzle?
The most common mistakes are using glue that isn't acid-free, not getting complete glue coverage to the edges, cutting before the glue is fully dry, and using a dull blade. Always use photo-safe glue, ensure full coverage, be patient, and start with a sharp blade for clean cuts.
How do I choose the right piece count for a custom puzzle?
Match the piece count to the solver's skill level. A 60-piece puzzle is great for young children, a 252-piece puzzle is perfect for families, and 520 or 1014-piece puzzles offer a satisfying challenge for advanced puzzlers.
For what special occasions do photo puzzles make a great gift?
Photo puzzles are a perfect personalized gift for celebrating major milestones and holidays. They are ideal for birthdays, anniversaries, Christmas, Mother's Day, Father's Day, graduations, and even as a unique wedding or retirement present.


